Introducing Thermal Interface Materials (TIMs): The Bridge for Heat
Even seemingly smooth surfaces of component dies (like CPU or GPU) and heatsinks possess microscopic imperfections. When these two surfaces are pressed together, these imperfections create tiny air gaps. Air is a very poor conductor of heat. Thermal Interface Materials (TIMs) are specifically designed to fill these air gaps, eliminating air and creating a more efficient thermal pathway between the heat-generating component and the heatsink, thereby facilitating better heat transfer.
Why Thermal Putty is a Smart Choice for Modern Laptops
Thermal putty, as an advanced TIM solution, is increasingly being adopted for the complex cooling needs of modern laptops. The compact interiors of laptops often mean multiple heat-generating components (VRAM, VRMs) have varying gap heights to the heatsink assembly, a scenario where traditional fixed-thickness thermal pads can struggle. Thermal putty's unique properties make it highly suitable for these challenges.
This article aims to be the definitive guide on a crucial, yet often misunderstood, aspect of laptop maintenance: determining and applying the correct amount of thermal putty for optimal cooling performance. We will delve into the nuances, ensuring you can approach this task with confidence. The thermal design of laptops often involves conducting heat from multiple sources (CPU, GPU, VRAM, VRM) to a shared, often intricately shaped, cooling module. These components often sit at slightly different heights relative to the cooling module, resulting in variable gap sizes that traditional fixed-thickness thermal pads may not optimally address. Thermal putty's high conformability and ability to fill these varied gaps make it an ideal solution.
Compared to the relatively common DIY task of applying thermal paste to a desktop CPU, applying putty across multiple, varied-height laptop components like VRAM and VRMs can seem more daunting. The user's query ("how much thermal putty for laptop") itself signifies a common area of uncertainty. This article will provide clear, authoritative, and actionable expert advice.
Chapter 1: Thermal Putty Fundamentals – Your Laptop's Unsung Cooling Hero
1.1. What Exactly is Thermal Putty?
Definition: Thermal putty is a highly pliable, typically non-curing (or very slow-curing) paste-like thermal interface material. Its primary function is to conform to and fill air gaps, including microscopic irregularities, between heat-generating electronic components (such as VRAM, VRMs, and sometimes CPU/GPU in specific laptop designs) and their heatsinks.
Composition and Key Properties:
- It is generally a silicone-based compound heavily infused with thermally conductive fillers (like ceramic powders, metal oxides, or other proprietary materials) to maximize heat transfer efficiency.
- High Conformability: Its most notable characteristic is its ability to perfectly mold to irregular surfaces and fill variable gap heights, ensuring maximum surface contact and eliminating air voids that impede heat flow.
- Electrical Non-Conductivity: Quality thermal putties, such as those from reputable thermal solution providers like Fehonda (e.g., LTP65, LTP81), are electrically non-conductive. This is a critical safety feature, preventing accidental short circuits.
- Durability & Stability: Good putties resist "pump-out" (migration due to thermal cycling) and drying out, maintaining consistent thermal performance over extended periods. For example, some products like Fehonda's LTP65 are designed to form a stable, dense layer.
1.2. Thermal Putty vs. Thermal Paste vs. Thermal Pads (A Laptop-Centric Comparison)
-
Thermal Paste (Grease):
- Description: A viscous, fluid-like compound, traditionally used for the direct interface between a CPU/GPU die and its heatsink.
- Laptop Relevance: Excellent for CPU/GPU dies. However, it's unsuitable for filling the larger, variable gaps often found around VRAM and VRM components in laptops.
-
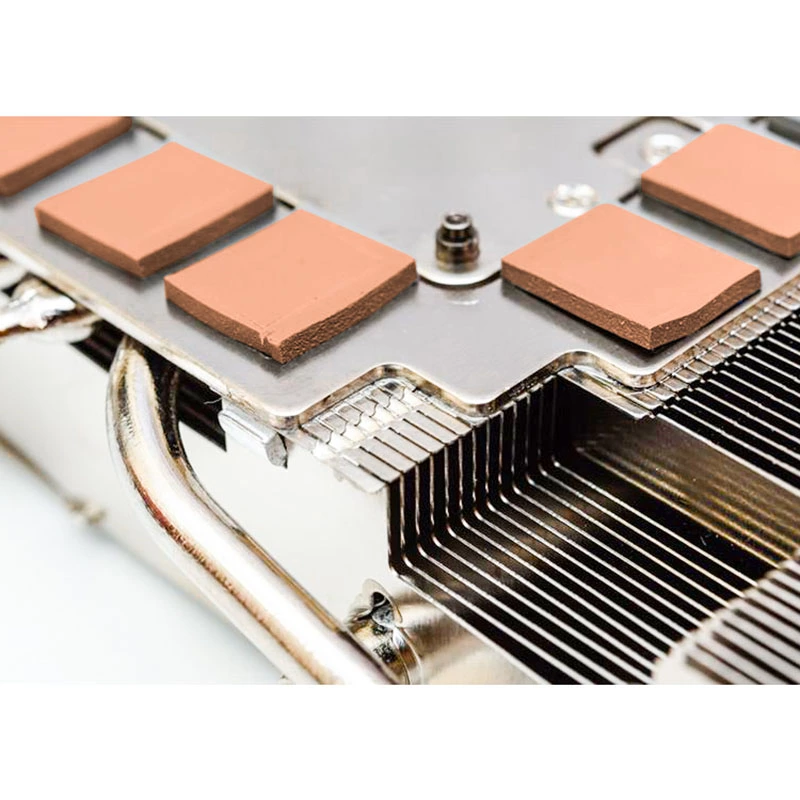
Thermal Pads:
- Description: Solid, pre-formed sheets of silicone or other flexible material, embedded with conductive fillers. Available in various fixed thicknesses.
- Laptop Relevance: Simpler to apply than paste for larger areas if the gap is uniform and known. However, selecting the exact correct thickness for each component in a laptop is critical and often very difficult, as OEM specifications are rarely public. Using a pad that's too thick can prevent the heatsink from making proper contact with the CPU/GPU die. Pads can also harden or dry out.
-
Thermal Putty:
- Laptop Relevance (Advantages):
- Adaptive Gap Filling: Conforms perfectly to varying heights of VRAM chips, VRM MOSFETs, chokes, etc., ensuring no air gaps.
- No Thickness Guesswork: Eliminates the need to precisely measure and source multiple specific pad thicknesses. Products like Fehonda LTP65 are explicitly marketed as not requiring users to measure old pads.
- Optimal Core Contact: Less likely than incorrectly sized pads to interfere with the crucial mounting pressure between the heatsink and the CPU/GPU dies.
- Longevity & Reusability (Conditional): High-quality putties maintain elasticity and resist drying out. Some can be carefully reshaped and reused if clean and not degraded.
- Laptop Relevance (Considerations): Can be messier to apply than pads if care is not taken. The "how much" question is critical.
Modern laptop interiors, with multiple heat sources like CPU, GPU, VRAM, and VRMs often cooled by a shared, complex heatsink assembly, present unique challenges. These components frequently have inconsistent gaps to the heatsink. Thermal putty's ability to flow and conform makes it superior in these scenarios. OEMs like Asus and console manufacturers (Sony PS5, Xbox Series X) are increasingly using thermal putty for VRAM/VRM cooling, validating its effectiveness.
Table 1: TIM Comparison for Laptop Applications
| Material Type |
Key Characteristics (Form, Conformability, Gap Filling) |
Typical Laptop Use Case |
Ease of Application |
Reusability (Conditional) |
| Thermal Putty |
Paste-like, high conformability, excellent variable gap filling |
VRAM, VRMs, other varying-height surface-mount components |
Moderate (requires care with amount) |
Possible (if clean, not degraded) |
| Thermal Paste |
Viscous liquid, conforms to smooth surfaces, fills micro-gaps |
CPU die, GPU die |
Moderate (requires care with amount/spread) |
No (must reapply if seal broken) |
| Thermal Pad |
Solid sheet, conformability depends on softness, fills fixed-thickness gaps |
Components with uniform, known gaps |
Simple (if correct thickness chosen) |
Generally not (performance degrades) |
1.3. Advantages of Choosing Thermal Putty for Your Laptop
- Superior Conformability: Adapts to irregular surfaces and varying component heights (VRAM, VRM MOSFETs, chokes).
- Simplified Application for Variable Gaps: No need to select multiple pad thicknesses. Some products, like Fehonda LTP65, highlight that users don't need to measure old pad thicknesses.
- Potentially Better CPU/GPU Die Contact Pressure: Less likely to lift the heatsink off the CPU/GPU die compared to incorrectly sized pads.
- Longevity and Stability: Quality putties resist drying out and pump-out effects better than some alternatives. Fehonda's LTP65, for example, forms a dense, lasting layer.
Chapter 2: Dialing It In: Determining the Ideal Amount of Thermal Putty for Your Laptop
2.1. Key Factors Influencing Putty Amount
Determining the correct amount of thermal putty involves considering:
-
Component Type and Size (CPU, GPU, VRAM, VRM):
- CPU/GPU Dies: Typically use thermal paste. This guide focuses on putty for VRAM/VRMs.
- VRAM Chips: Small rectangles needing full surface coverage.
- VRM MOSFETs and Chokes: Vary in size/height; putty must adapt.
-
Gap Size Between Component and Heatsink:
- Most critical factor. Putty must fill the void without being excessively thick.
- Laptops have inconsistent gaps; putty excels here. Products like Fehonda LTP81 can handle gaps from 0.3mm to 3.0mm.
-
Putty Properties (Viscosity and Compressibility):
- Softer, more compressible putties (like some "putty based pads" ) might be more forgiving with initial amounts as excess squeezes out.
- Stiffer putties need more precise initial amounts. Fehonda LTP65 and LTP81 are noted for good softness and conformability under low pressure.
2.2. General Principle: "Just Enough" – Not "More is Better"
- The Goal: Create a continuous, void-free thermal path with the thinnest possible putty layer that ensures full contact.
- Consequences of Too Little Putty: Air gaps remain, leading to poor heat transfer and hotspots.
- Consequences of Too Much Putty:
- Excess squeezes out, creating a mess. While quality putties like Fehonda's are non-conductive, spillage is undesirable.
- Critically for Laptops: Too much putty on VRAM/VRMs can act as a standoff, preventing the heatsink from making optimal contact with CPU/GPU dies, leading to increased core temperatures.
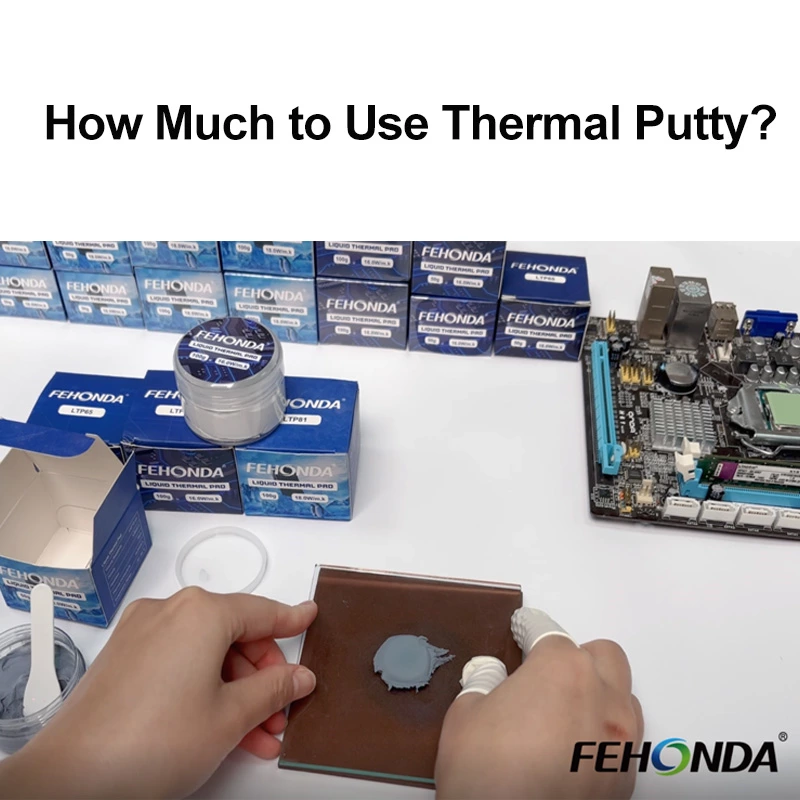
2.3. The "Test Fit" or "Impression" Method: A Pro Technique for Precise Application
The "Test Fit" or "Impression Method" is highly recommended for applying thermal putty in laptops with complex, variable gap heights. It helps determine the precise amount needed.
-
Core Concept: Apply a conservative amount of putty, temporarily install the heatsink with normal pressure, then remove it to inspect the putty's spread and contact imprint. This visual feedback shows if more or less putty is needed.
-
Step-by-Step Guide:
- Thorough Cleaning: Clean all component surfaces (VRAM, VRMs) and heatsink contact areas with IPA and lint-free cloths.
- Initial Putty Application: Apply small, conservative amounts of putty (e.g., small "balls" or "logs" on VRAM chips ). User Snarks_Domain suggests for a Zephyrus G14, one might use ~15g from a 20g putty purchase, applying to VRAM/VRMs, test fitting, then applying paste to CPU/GPU dies for final assembly.
- Heatsink Installation (Test Fit): Carefully place the heatsink and secure it with normal mounting pressure.
- Allow for Settling: Wait a few minutes for the putty to compress.
- Careful Heatsink Removal: Lift the heatsink straight up, avoiding smearing.
- Inspect the Imprint:
- On Components: Is putty fully covering the surface? Is it evenly thin? Any bare spots?
- On Heatsink: Clear, even imprints from each component? Consistent thickness?
- Key Indicators: Ideal is a thin, uniform layer covering the component, minimal squeeze-out. Bare spots mean too little; excessive squeeze-out means too much.
- Adjust Putty Amount: Add more to areas with poor contact; reduce for areas with too much squeeze-out.
- Clean and Repeat (If Necessary): If the first test fit isn't ideal, clean off all putty and repeat until a good imprint is achieved. This ensures optimal putty for each component without compromising CPU/GPU die contact.
- A tip: Cover the heatsink contact areas with thin plastic wrap during the test fit to prevent putty from sticking, making adjustments easier. Remove before final assembly.
The "Test Fit" method is crucial for laptops due to variable internal gap heights and the sensitivity of CPU/GPU die contact. If too much putty is on a VRAM chip (with a potentially larger gap), it can "lift" the heatsink, preventing proper pressure on the CPU/GPU die (with a potentially smaller gap). This method helps find the minimum effective amount of putty for each component. Unlike pre-cut pads where thickness is fixed (and often unknown for specific laptop models), putty with a test fit gives users control for an optimized application, even without OEM data.
Chapter 3: Applying Thermal Putty in Laptops: A Step-by-Step Guide
3.1. Preparation: Safety First, Cleanliness is Key
- Safety Precautions:
- Power off the laptop, unplug the AC adapter, and if possible, remove the battery.
- Use an anti-static wrist strap and work in a clean, well-lit area.
- Gather Your Tools:
- Thermal putty (e.g., Fehonda LTP65 or LTP81).
- High-concentration IPA (90%+).
- Lint-free cloths (microfiber recommended) and cotton swabs (Q-tips). Coffee filters are an alternative.
- Plastic spudger or non-metallic scraper (some TIM products include one, like Fehonda LTP65, TR50 , TG-8 ). Avoid metal tools.
- Gloves recommended for manual putty application.
- Removing the Heatsink:
- Consult the laptop's service manual if available. Usually involves unscrewing heatsink screws in a specific sequence (often numbered) to release pressure evenly.
- Gently lift the heatsink. If stuck, do not force it. Old TIM can be adhesive. Slight twisting or pre-warming the laptop can help.
- Cleaning Old TIM:
- Thoroughly remove all old thermal paste, putty, and pad residue from CPU/GPU dies, VRAM chips, VRMs, and heatsink contact surfaces.
- Use IPA-dampened cloths. For stubborn residue, let IPA soak. Q-tips are good for edges.
- For very hard old paste, acetone can be used cautiously (avoid plastics).
- Ensure surfaces are completely dry before applying new putty.
3.2. Thermal Putty Application Techniques
- General Approach: Apply enough putty to fill the gap and cover the component's thermal surface after heatsink compression.
- For VRAM Chips:
- Common methods: small "balls," "logs," or "sausages" of putty on each chip.
- Amount depends on gap height determined by "test fit." Some suggest starting with a ~1cm putty ball for VRAM , or 6mm balls slightly pressed down.
- Users may roll putty into strips and cut to length.
- Goal: full VRAM chip top surface coverage after compression.
- For VRM Components (MOSFETs, Chokes, etc.):
- Similar to VRAM, apply appropriately sized and shaped putty based on component size and height. VRMs can vary more.
- One example mentions 6mm diameter logs for VRMs.
- Using a Spatula/Spreader:
- Some putties (like Fehonda LTP65) may include or recommend a spatula.
- Can be used to shape putty on components or spread it if gaps are small and uniform (like very thick paste).
- Aim for an even layer.
- Manual Application (Gloves Recommended):
- Roll putty between gloved fingers to form balls or logs. Offers good control over amount and shape.
- Amount Estimation (Reiteration of Test Fit Importance):
- Refer to the "Test Fit" method in Chapter 2. Always start conservatively. It's easier to add more putty than to clean up excess that might compromise CPU/GPU die contact.
- Reddit user Snarks_Domain shared using ~15g from a 20g putty purchase for a Zephyrus G14, test-fitting on VRAM/VRMs first, then applying paste to CPU/GPU dies for final assembly.
- Visual Aids: Ideally, include diagrams or photos showing recommended putty placement on typical laptop VRAM/VRM layouts. (Stock photos like often show paste on dies; custom diagrams for putty on VRAM/VRMs would be better).
3.3. Applying Thermal Paste to CPU/GPU Dies
- Note: This section assumes standard thermal paste for CPU/GPU dies, as putty is typically for surrounding components. If using putty on dies (uncommon, riskier for die contact), adjust instructions.
- Cleaning: Ensure CPU/GPU die surfaces are immaculate (covered in 3.1).
- Amount: For laptop CPU/GPU dies, a small, pea-sized (3-5mm diameter), rice-grain-sized, or ~0.3-0.4ml dot of thermal paste in the center is usually sufficient.
- Application Methods (for paste on die):
- Dot Method: Most common and recommended. Heatsink pressure spreads it.
- Line/Cross Method: Sometimes for larger/rectangular dies.
- Spread Method (Buttered Toast): Manually spread with a spatula. Good if done carefully, but risks air bubbles. Some products like Fehonda TR50 include stencils/spreaders ; Fehonda TG-8 also suggests even spreading.
- Intel and others often recommend letting heatsink pressure spread the paste.
3.4. Reinstalling the Heatsink and Post-Application Checks
- Heatsink Installation:
- Carefully align heatsink over CPU/GPU dies and putty-applied components.
- Lower vertically, avoid sliding/twisting to prevent smearing paste/putty.
- Tighten screws in a star/diagonal pattern, gradually, to ensure even pressure. Do not overtighten.
- Visual Inspection: Check for excessive putty/paste squeeze-out. Clean minor spills with IPA on a Q-tip.
- Post-Application Checks:
- Reassemble laptop.
- Power on and monitor CPU/GPU temperatures (idle and load) using software like HWMonitor, Core Temp.
- Compare to pre-replacement temps if known. Should see improvement if old TIM was degraded.
- If temps are worse, it could indicate poor heatsink mount, incorrect putty amount (especially too much on VRAM/VRMs affecting die contact), or insufficient paste on dies. This requires disassembly and re-application.
The success of thermal putty application is closely tied to the mechanical precision of the heatsink installation. Uneven pressure or incorrect tightening can compromise the putty's effectiveness. Emphasize correct heatsink installation as much as putty application. The "test and monitor" phase is crucial feedback, especially for thermal putty where the applied amount dictates the compressed thickness. High post-application temperatures signal a need to re-evaluate the putty application.
Chapter 4: Common Pitfalls & Expert Answers
4.1. Consequences of Using Too Much or Too Little Putty
-
Too Little Putty:
- Incomplete coverage, air gaps.
- Poor heat transfer, higher component temperatures, potential thermal throttling.
- Localized VRAM/VRM hotspots affecting stability and lifespan.
-
Too Much Putty:
- Messy Application: Squeezes out, potentially onto PCB. While quality putties like Fehonda's are non-conductive, excess attracts dust.
- Compromised Heatsink Mount (Critical for Laptops): Too much putty on VRAM/VRMs can lift the heatsink, preventing optimal contact with CPU/GPU dies, leading to increased core temperatures. This is a common and significant issue.
- Increased Thermal Resistance: An overly thick putty layer (beyond filling gaps) has higher thermal resistance than an optimized thin layer.
4.2. Can Thermal Putty Be Reused?
The reusability of thermal putty is nuanced. Some specialized industrial putties are designed for reuse (e.g., Thermo-Trap , Viper Wet Ragg ). For general electronic TIM putties:
- Possibility: If the putty remains malleable, clean, hasn't dried out, and shows no significant oil separation, it might be reshaped and reused.
- Risks:
- Contamination: Used putty easily picks up dust and oils, degrading performance.
- Degradation: Properties can change with use and thermal cycling (drying, stiffening, oil bleed). Factory-applied putty in Asus laptops, for instance, can dry and crumble.
- Best Practice: For optimal performance, especially in demanding laptops, using fresh, high-quality putty is always recommended.
Traditional thermal paste must always be replaced if the seal is broken. Thermal pads are also generally not reusable once compressed or damaged. Recommendation: While technically possible for some putties in ideal conditions, for reliable laptop maintenance, always use fresh putty upon each heatsink removal.
4.3. When Should You Replace Thermal Putty?
- During Any Heatsink Removal: If the heatsink is removed for maintenance, cleaning, or upgrades, inspect and consider replacing the putty, especially if its condition or age is unknown.
- Signs of Performance Degradation or Physical Change:
- Unusually high temperatures on components cooled by putty (VRAM, VRMs), or indirectly affecting CPU/GPU die contact.
- Putty appears visibly dried out, cracked, crumbly, or shows significant oil separation.
- Time-Based Replacement (Preventative): Consider replacing every 2-3 years, similar to high-quality thermal paste, especially for laptops with frequent, significant temperature changes. Some TIMs claim 5+ year lifespans.
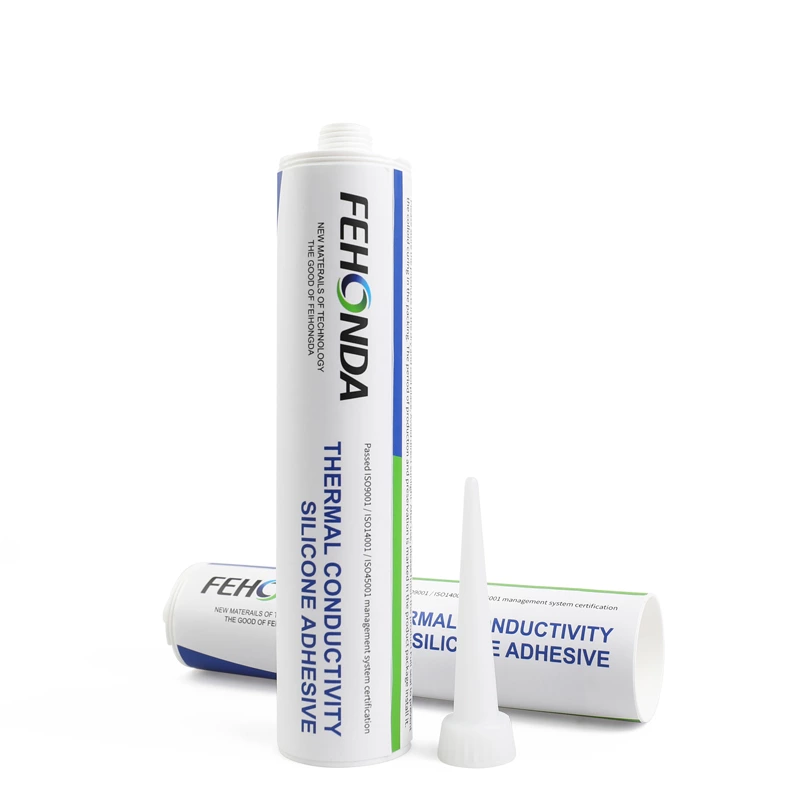
4.4. A Note on Quality Thermal Putty Solutions (e.g., Fehonda)
Choosing a quality thermal putty is crucial. Products from reputable brands are formulated for specific thermal challenges.
-
Example: Fehonda LTP65 Thermal Putty:
- Key Feature: 16 W/mK thermal conductivity.
- User Benefit: Addresses the pain point of unknown gap thicknesses: "You don't have to measure the thickness of your old thermal pads or look up the specification online... This is why this liquid thermal pad from Fehonda is needed.".
- Application: Easy to apply with included spatula, forms a dense layer, good softness and low-pressure conformability.
- Safety: Electrically non-conductive, non-corrosive, UL 94 V-0 flame retardant, ISO certified.
- Ideal For: Replacing VRAM/VRM pads in laptops where gap thickness is unknown or variable.
-
Example: Fehonda LTP81 Thermal Putty:
- Key Feature: Higher 18 W/mK thermal conductivity for more demanding components.
- User Benefit: Top-tier thermal performance. User review: "pretty much equal to the oe pads on my xfx gpu".
- Application: Easy to apply, good softness/conformability, slight tackiness aids pre-assembly, fills 0.3mm-3.0mm gaps.
- Safety: Electrically non-conductive, UL 94 V-0, ISO certified.
- Ideal For: High-performance gaming laptops, mobile workstations needing maximum VRAM/VRM cooling.
-
General Brand Strengths (subtly implied from ):
- Commitment to R&D and quality control (ISO, UL, RoHS, REACH certifications).
- Experience in thermal materials.
- Products used in diverse applications, including GPU cooling.
Understanding why certain practices are best (e.g., why too much VRAM putty harms CPU/GPU die contact due to heatsink lift ) builds user confidence. Mentioning that quality products (like Fehonda's) are designed to mitigate some risks (e.g., non-conductive , easy to apply) subtly builds trust.
Table 2: Example Quality Thermal Putty Overview (e.g., Fehonda)
| Product Name (Example) |
Thermal Conductivity (W/mK) |
Key Features (Ease of Use, Conformability, Accessories) |
Recommended Laptop Applications |
| LTP65 |
16 |
Easy to apply (spatula included), single-component, good softness & low-pressure conformability, non-corrosive, electrically non-conductive |
Replacing VRAM/VRM pads where gap thickness is unknown/variable. |
| LTP81 |
18 |
Easy to apply, good softness & low-pressure conformability, slight tack, electrically non-conductive, fills 0.3-3.0mm gaps |
High-performance gaming/workstation laptop VRAM/VRM cooling. |
This table links product features to user needs, presenting them as solutions without aggressive marketing.
Conclusion: Maximize Your Laptop's Potential with Proper Thermal Care
Key Takeaways Recap
- The correct amount of thermal putty is crucial: "just enough" to fill gaps completely without compromising core component contact.
- The "test fit" method is invaluable for determining the right putty amount in laptops.
- Cleanliness and methodical application are fundamental for effective cooling.
Benefits of Proper Thermal Management
- Sustained high performance by minimizing thermal throttling.
- Increased lifespan of internal laptop components.
- Potentially quieter operation (fans don't need to work as hard).
Empowerment Through Knowledge
With the right knowledge and suitable materials (like high-quality options from brands such as Fehonda), users can confidently maintain and improve their laptop's thermal health. This guide aims to demystify thermal putty application, helping users achieve better cooling. This knowledge transfer itself is a form of brand value, empowering users.
Call to Action (Soft)
Readers are encouraged to consult reliable guides like this one and choose high-quality thermal interface materials appropriate for their specific needs. The ultimate aim is a cooler, more stable, and longer-lasting laptop.